

What to Do If Paint Runs and Sags: How to Fix Uneven Paint After It Dries
What to Do If Paint Runs and Sags: How to Fix Uneven Paint After It Dries
You’ve finished your renovation, waited for the walls or metal structures to dry completely, but under side lighting, you notice frustrating defects: uneven sags, hardened drips, and roller marks. Sounds familiar?
Don’t panic or rush to scrape everything off. In the paint business, almost any mistake can be fixed. The key is knowing the right technique. In this article, we’ll take a closer look at why paint runs occur and how to restore a flawless look to your surfaces.
Why Does Paint Apply Unevenly?
Before reaching for your tools, it’s crucial to understand the root cause of the defect so you don’t repeat it when applying the next coat. Most paint runs are caused by three main factors:
An Overly Thick Coat. Trying to cover the old color in a single pass is a major mistake. The paint simply doesn’t have time to tack up, and gravity pulls it downward.
Over-Thinning. If too much water or solvent is added to the paint, it loses its viscosity and becomes overly fluid.
The Wrong Tool. Using a roller with an incorrect nap length or overloading a brush with paint will inevitably leave "ridges" and drips.
Step-by-Step Guide: How to Fix Dries and Sags After Drying
The fix depends on the surface type and the severity of the defect. Essential condition: the paint must be completely dry and cured (this typically takes 24 to 48 hours, depending on the paint type).
Step 1: Localized Sanding
Do not try to scrape away a fresh sag with a putty knife — you risk stripping the paint down to the substrate (putty or bare metal), making the spot even larger.
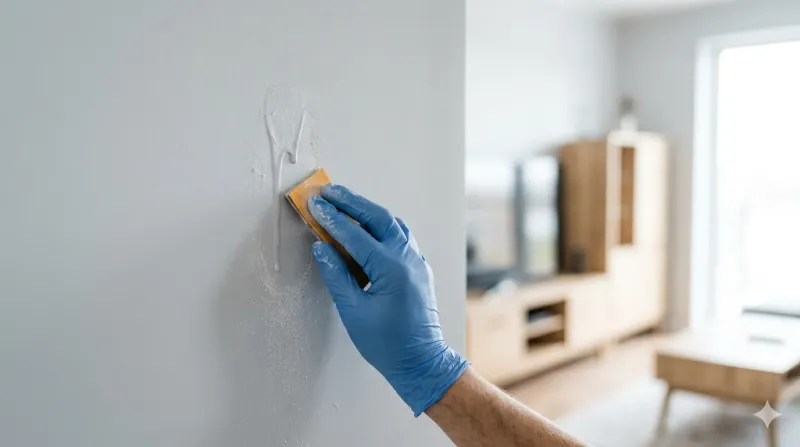
Use a fine-grit sandpaper (P180–P240) or a dedicated sanding block.
Gently sand the sag or drip using circular motions, trying not to scratch the smooth surrounding areas.
Sand until the boundary between the defect and the main surface feels completely seamless to the touch.
Expert Tip: If the sag occurred on a vertical pipe or a metal profile coated with a primer-enamel (such as «Zakhyst 3v1» by Polifarb), wet sanding (slightly dampening the sandpaper) is preferred to avoid deep scratches.
Step 2: Dust Removal and Cleaning
Sanding generates a massive amount of fine dust. If left uncleaned, the new coat of paint will turn out bumpy and quickly peel off.
Thoroughly brush away the dust with a dry brush or vacuum the area.
Wipe the surface with a slightly damp, lint-free cloth and let it dry completely.
Step 3: Spot Priming (If Necessary)
If you accidentally sanded through the coating down to the drywall putty or bare metal, the exposed area must be spot-primed. This equalizes the surface absorption rate, ensuring the topcoat won't differ in color or gloss.
Step 4: Applying the Topcoat
Simply dabbing the spot with a brush won't work — the patch will stand out.
Thin the paint strictly according to the instructions on the can (for the final coat of water-based paint, adding no more than 5–10% water is allowed).
Apply a thin coat of paint over the entire affected zone (e.g., from corner to corner of the wall or across the entire metal part), rolling it out thoroughly.
How to Avoid Paint Runs in the Future: 4 Golden Rules from Polifarb
To ensure your next painting project goes smoothly and yields perfectly level walls, follow these professional painter rules:
The "Two Thin Coats Are Better Than One Thick" Rule. High-quality interior paints (like the Polifarb STANDARD or «Barvy Pryrody» lines) offer excellent hiding power, but they perform best when applied in multiple thin layers.
Unload Your Tool Properly. When using a roller, always use a paint grid or tray. The roller should be evenly saturated, but it shouldn't drip.
Mind the Temperature. Do not paint at temperatures below +5°C or above +30°C. Excessive heat causes the paint to dry too quickly, reducing its self-leveling window, while cold temperatures lead to sagging.
Keep Your Strokework Consistent. Apply the paint using vertical strokes, then distribute it horizontally (the W-technique), finishing with final roller passes executed strictly in one direction (e.g., top to bottom).
Summary
Sags and runs are not a death sentence for your renovation. Armed with patience, fine sandpaper, and premium paint from Polifarb, you can easily bring your walls back to a flawless finish. The golden rule is simple: do not rush, and let the material cure completely before attempting any fixes.
Still have questions about selecting the right paint or application techniques? Ask our technical experts in the comments below or visit your nearest Polifarb Tinting Center!